What not to do before highlighting your hair?
Importance of Preparing for Hair Highlighting
Preparing for hair highlighting is more crucial than many people realize. Before you dive into transforming your hair with highlights, understanding the significance of preparation can make a big difference in the final outcome. Proper preparation not only ensures that the highlights enhance your look but also helps maintain the health of your hair.

Highlighting is a chemical process that can potentially damage your hair if not done correctly. By preparing well, you can minimize any harmful effects and achieve the desired look more effectively. Your hair is a canvas, and taking the time to prepare before applying any color can lead to more vibrant and long-lasting results. Proper preparation allows the color to adhere better and produce a more even tone throughout your hair.
Moreover, getting your hair in the best possible condition beforehand increases the likelihood of achieving the exact shade you’ve envisioned. It’s about working smarter, not harder—investing a little time in preparation can save you from potential disappointment and even costly color corrections down the road.
Ultimately, the benefits of preparing for hair highlighting extend beyond aesthetics. It can protect your hair’s integrity, resulting in healthy, glossy locks that are as beautiful as they are durable. So, before your next appointment, consider what steps you can take to prepare your hair for the best highlighting experience possible.
Understanding Your Hair Type and Condition
Before you go for hair highlighting, it’s crucial to understand your hair type and its condition. Knowing whether your hair is oily, dry, curly, straight, thick, or thin can significantly impact the highlighting process and help achieve the best results. Each hair type reacts differently to chemical treatments, and understanding these nuances is essential for maintaining healthy hair.
Start by assessing your hair’s current condition. Is it damaged, brittle, or over-processed? If so, it might not be ready for highlights. Highlighting involves bleaching or altering the hair’s pigments, which can be harsh on already fragile strands. Therefore, if your hair is damaged, consider nourishing it with deep conditioning treatments and strengthening masks before your appointment. This pre-treatment can help minimize damage and maximize the vibrancy and longevity of the highlights.
Next, consider your scalp’s oiliness. For instance, if you have an oily scalp, it’s generally advised not to wash your hair right before highlighting. Natural oils protect the scalp and hair, reducing the risk of irritation and damage during the treatment. On the other hand, if your hair is naturally dry, frequent washing can exacerbate the dryness, which can make highlighting more challenging.
By understanding your hair type and condition, you can discuss the most suitable highlighting options with your stylist and choose products that support your hair’s health and style goals. This insight ensures that your new highlights not only look stunning but also keep your hair healthy and strong.
Consult with a Professional Stylist
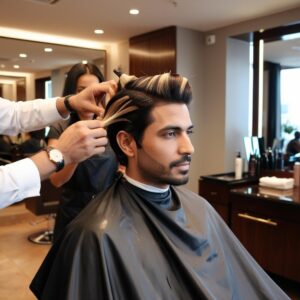
Before you jump into highlighting your hair, one of the most crucial steps is to consult with a professional stylist. This might seem like a straightforward task, but choosing the right stylist can make a significant difference in achieving your desired results. A professional stylist can offer insights and advice tailored specifically to your hair type and condition, which is something DIY methods and over-the-counter kits can’t provide.
During your consultation, discuss your hair goals and bring inspiration pictures if possible. This helps the stylist understand your vision and evaluate how achievable it is based on your current hair state. They can suggest shades that complement your skin tone and offer maintenance tips, ensuring that your new highlights not only look great initially but stay vibrant over time.
A stylist will also assess the health of your hair to determine if it’s in a suitable condition for highlighting. If not, they might recommend treatments or a prep routine to strengthen your hair beforehand, reducing potential damage and improving the overall result.
Lastly, a professional consultation allows you to discuss any concerns or questions you have about the highlighting process. This clarity can ease any worries, providing a comfortable and confident experience as you embark on your hair transformation journey. So, don’t skip this important step—consulting with an expert can be the key to radiant, head-turning highlights that enhance your overall look.
Avoid Washing Your Hair Right Before the Appointment
When it comes to highlighting your hair, timing your hair wash is crucial. One common mistake is washing your hair right before your salon appointment, which can affect the outcome of your highlights. But why is that?
Natural oils produced by your scalp play a protective role during chemical treatments. These oils act as a barrier that can help minimize potential irritation from the highlighting process. If you wash your hair the day of or even the night before your appointment, you’ll strip away these beneficial oils. This can leave your scalp more vulnerable to discomfort and possible irritation.
Furthermore, freshly washed hair can sometimes make it more difficult for the stylist to achieve consistent results. Products like shampoo or conditioner might leave slight residues that can interfere with how evenly the color adheres to your hair. By allowing a day or two between your last wash and your highlighting session, you’re giving your hair a more natural state for the stylist to work with, allowing for precise application and better absorption of the highlights.
To get the best results from your highlights, consider washing your hair two days before your appointment. This will ensure your natural oils are intact while also preventing excessive oiliness that could affect the stylist’s work. Taking this simple step can make a significant difference in achieving those beautiful, vibrant highlights you’re aiming for.
Refrain from Using Heavy Hair Products
When gearing up for a hair highlighting session, steering clear of heavy hair products is crucial. These products, including gels, oils, and deep conditioners, can leave a residue on your hair that creates a barrier between your strands and the highlighting formula. This interference can lead to uneven color distribution and a less vibrant finish.
In the days leading up to your appointment, try to simplify your hair care routine. Stick to a gentle shampoo and a lightweight conditioner, which cleanse your hair without coating it with excess products. This ensures your hair is in its most natural state, allowing the stylist to apply highlights more effectively.
Using heavy products can also weigh your hair down, making it more challenging to assess its natural texture and movement—important factors a stylist considers when planning your highlights. This could result in a final look that doesn’t quite match your expectations or flatter your natural features as well as it could.
Moreover, avoiding heavy products helps maintain the overall health of your hair. Continuous use can lead to product buildup, which may dull your hair’s appearance and reduce its ability to retain moisture. Healthy hair, free from build-up, absorbs color better and holds onto the highlight’s vibrancy for longer.
Ultimately, by skipping heavy hair products before your highlighting appointment, you set the stage for a successful salon experience. Embrace lighter formulas and let your natural beauty shine through, ensuring your new highlights look as fresh and vibrant as possible.
Skip Overusing Heat Tools Prior to Highlighting
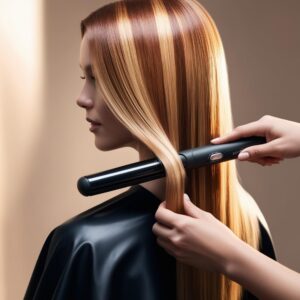
When you’re preparing to highlight your hair, it’s important to minimize the use of heat styling tools. Frequent use of straighteners, curling irons, or blow dryers can cause damage to your hair, leaving it dry and vulnerable. This damage can compromise the absorption of hair dyes, leading to uneven color and less vibrant highlights.
Using heat tools excessively strips your hair of natural oils, which are crucial for maintaining its health and strength. These oils help in protecting your hair during the chemical processes involved in highlighting. If your hair is dry and brittle due to heat damage, the highlighting process can make it more prone to breakage and split ends.
To achieve the best results, limit the use of high-heat tools at least a week before your appointment. Give your hair a break by air drying whenever possible and embrace more natural hairstyles. If you absolutely must use a heat tool, make sure to apply a heat protectant spray to create a barrier between your hair and the intense heat.
By reducing heat exposure, your hair will be in a better condition to endure the highlighting process, ensuring that the final results are smooth and vibrant. Remember, healthy hair not only looks better but also holds color longer, allowing you to enjoy your new highlights without unnecessary damage or fading. This simple step can make a big difference in the overall look and longevity of your highlights.

